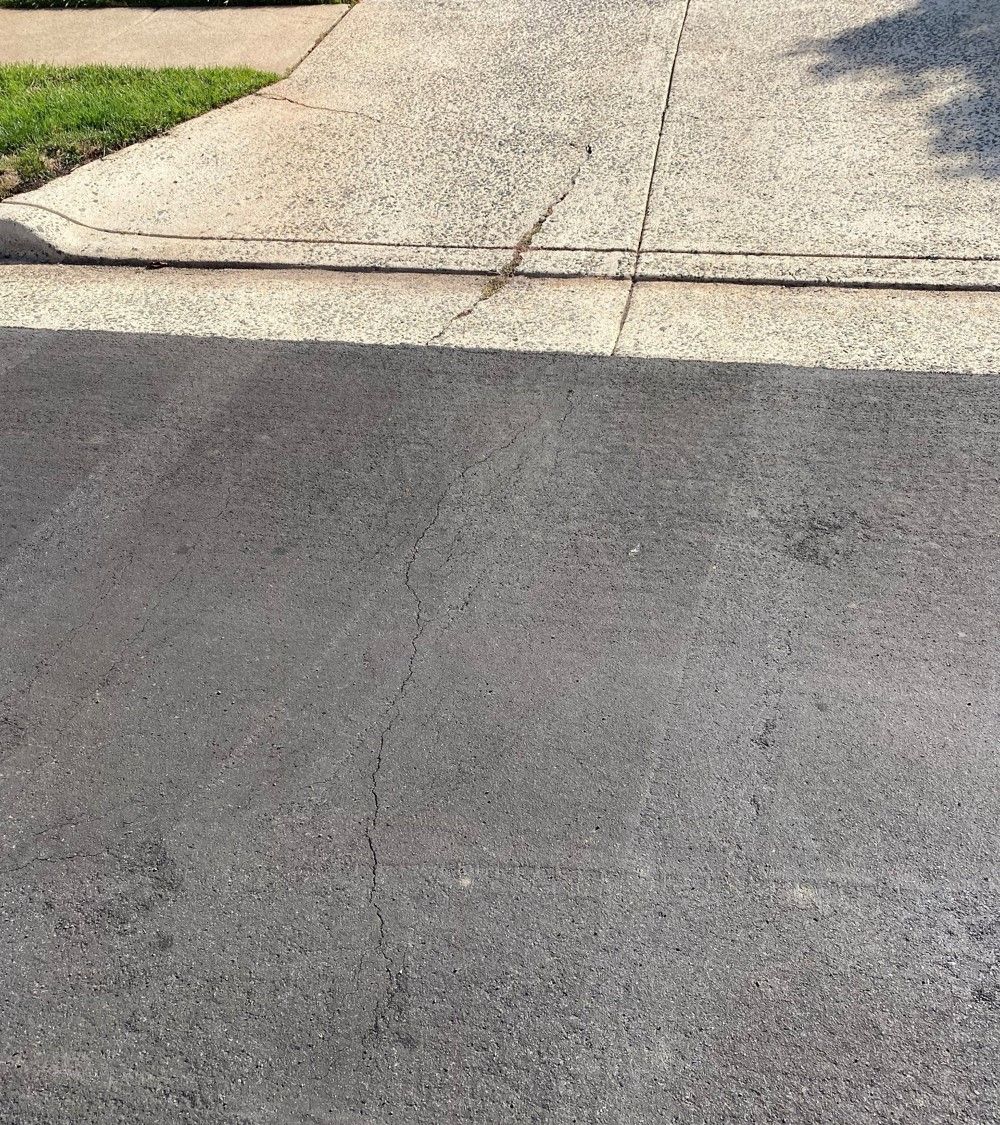
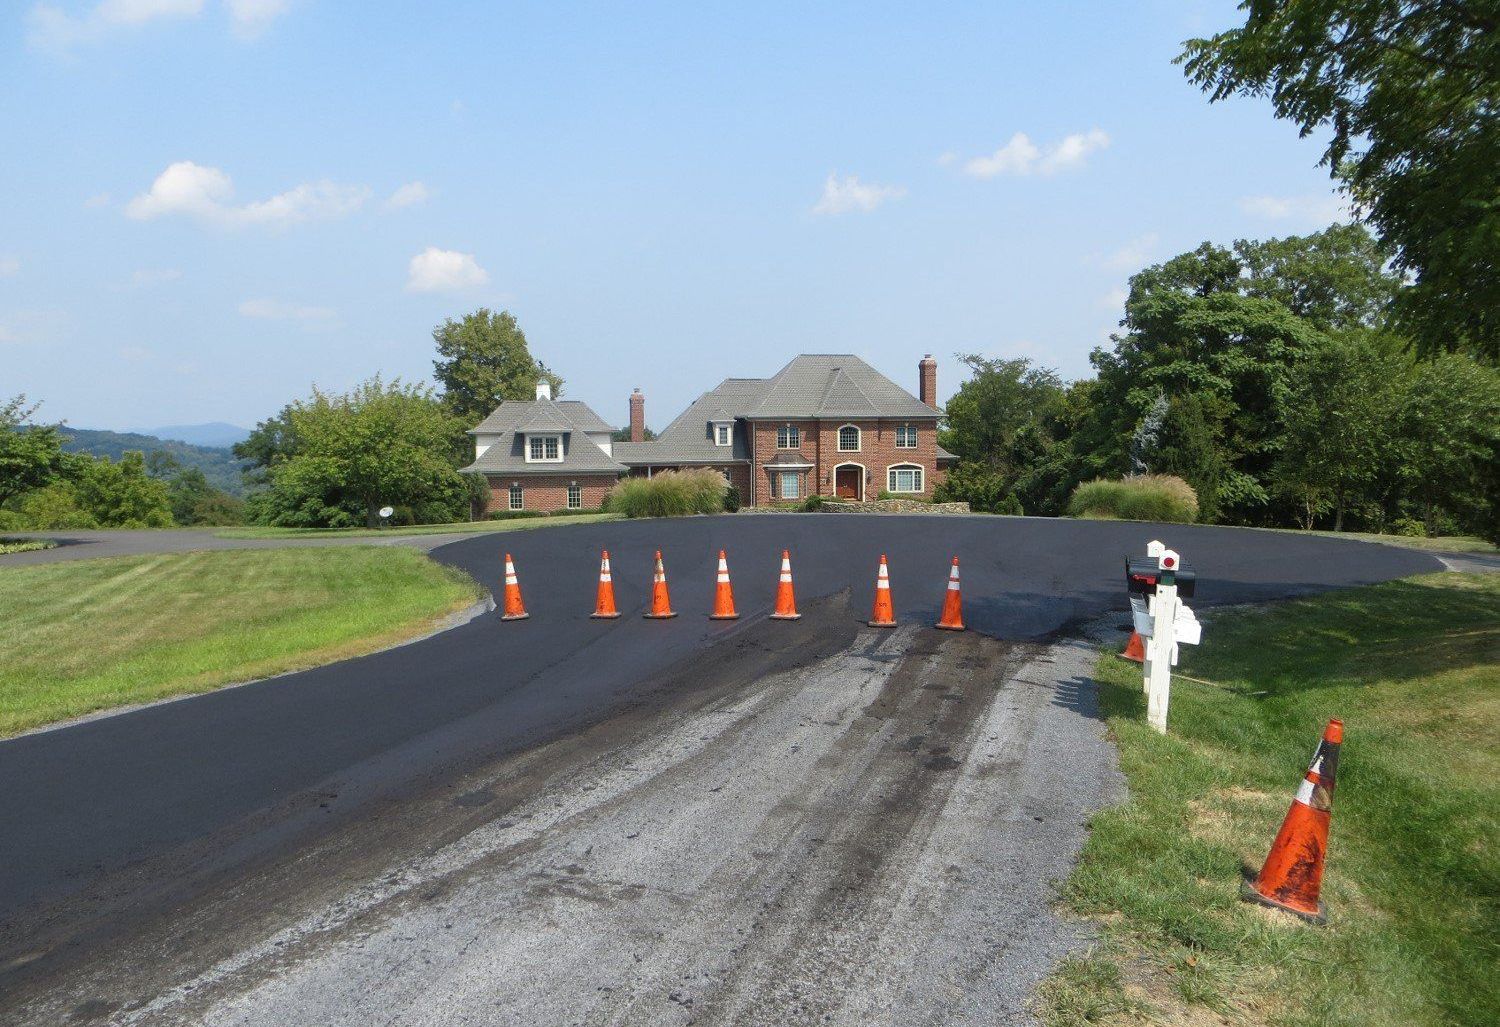
Crack Sealing - Water is one of the most harmful elements for an asphalt road. It's what creates potholes from cracks. Sealing them prior to resurfacing ensures that even if the crack reflects back to the surface, it will still be protecting the road base. Testing at the National Center for Asphalt Technology has shown that crack seal alone has been shown to extend service life by 7 years or more. See a video of the operation here.
Pavement Preservation with slurry surfacing is not an "apply-and-forget" process. It requires surface preparation prior to application, time to set and dry during application, and time to cure and settle into its final surface profile. Because of this, attention from residents is needed to ensure a good outcome. Learn below how projects are accomplished, and what you should expect throughout the process. Also find valuable tips on driving, parking, and getting around during installation, as well as how you can help us ensure a safe and successful project.
Before Slurry
Before streets can be preserved with slurry seal, they need to be properly prepared. This includes sealing cracks and patching failed pavement. Because of scheduling constraints and requirements, these may be completed well before the slurry seal is scheduled.
Crack Sealing
-Quick-moving operation
-On-street parking affected
-Work zone protected by flaggers
Patching
-Localized failures fixed with asphalt
-Includes potholes, utility cuts, wide cracks, “alligator” cracking
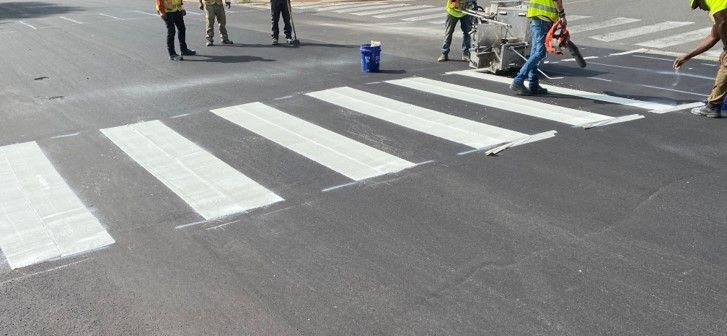
Eradication
-Thermographic road markings are removed
-Painted road markings are left in place
-Eradicated markings are replaced with temporary markings where specified by contract


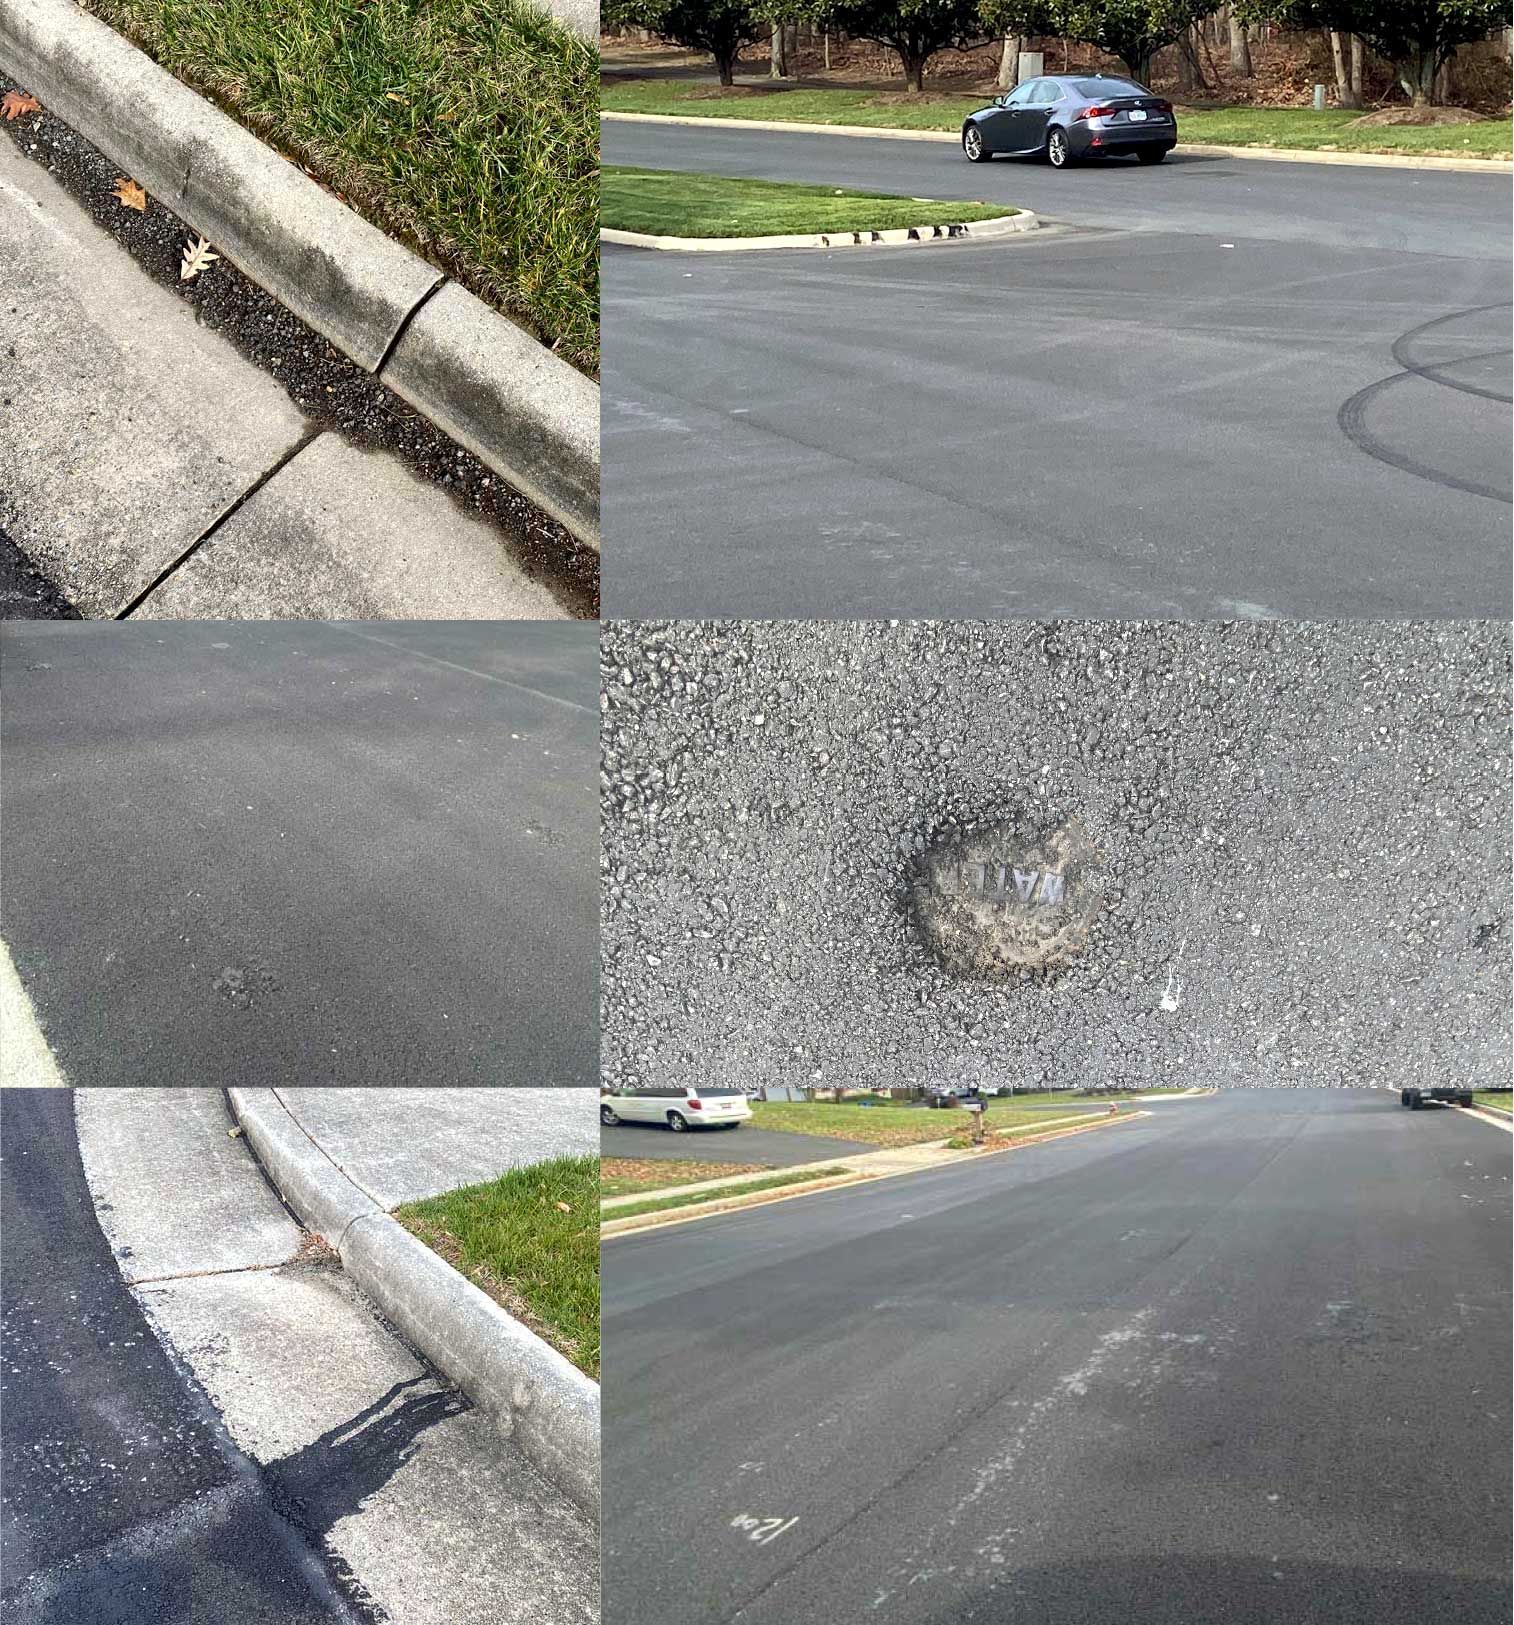
Patching - When age, water intrusion or base problems create failures on the surface, they can be patched with new asphalt to extend the service life of the road. Doing so provides a stronger and more uniform surface for the new slurry seal to conform to.

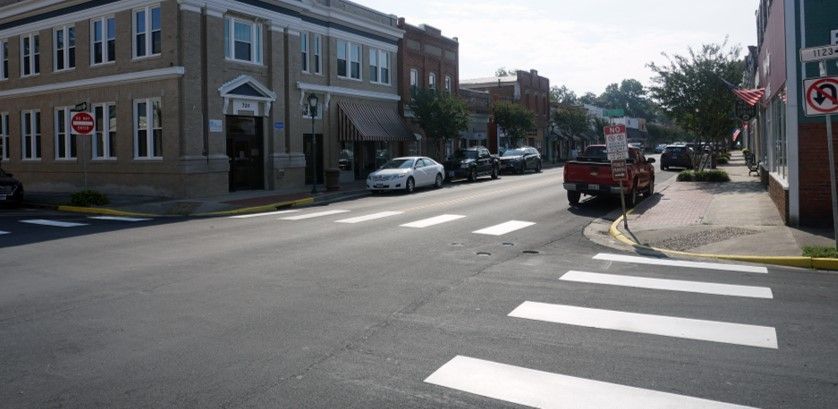
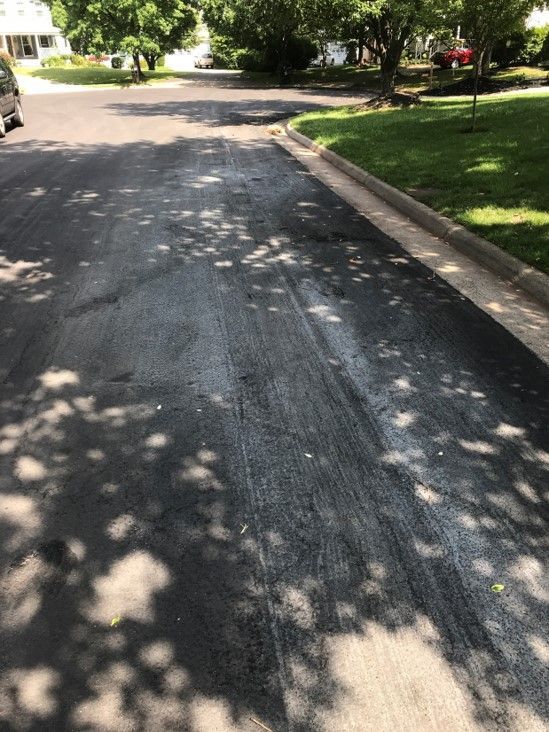
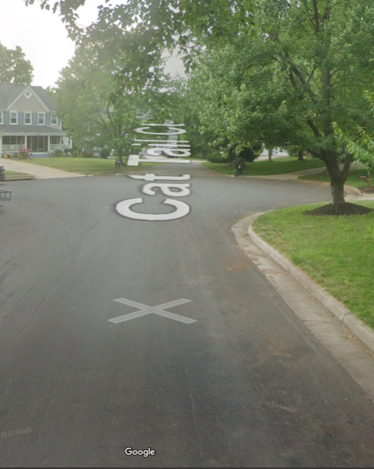
Eradication - In order for the slurry seal to bond with the road, thermoplastic road markings have to be addressed. In neighborhoods, this is usually crosswalks and stop bars. In this process, the surface of the markings are ground to remove any slick parts and leave a texture that the slurry will bond to. The markings are usually still visible as you can see in the photo. Painted markings don't need eradication. Temporary markings are not usually required on low-volume neighborhood streets.
During Slurry
The actual application of the slurry seal is fairly straight-forward. The road is prepped and the slurry machine places material leaving one lane open for access. The machine will likely spend less than five minutes in front of a home or 30 minutes on a street. When the slurry is dry enough for traffic, usually 1-4 hours, the remaining side/lane is completed. You can watch a video of the process here.
TIPS: You will not be able to get out of your drive for a brief time after a slurry surface is applied, so park your vehicle within walking distance if you need to leave after the daily start time.
If you need to make special arrangements, call your local crew supervisor whose number will be on your notice. We understand that life happens and will work to accommodate you.

Notification: 2-3 Days Before Slurry Seal
-Notices will be distributed with dates and instructions
-Generally, No Parking signs with the most current dates will be posted in advance
-If we're delayed by weather or other circumstances, signs will be updated

Road Prep: Application Imminent
-Utilities are covered, cones are staged and the road is swept to ensure a good bond
-Fairly fast-moving processes so it causes very little disruption to traffic or routine
TIP: Sweeping signifies that the slurry seal application is imminent and residents should exit their driveways so they don't get blocked in by a lane of wet slurry.

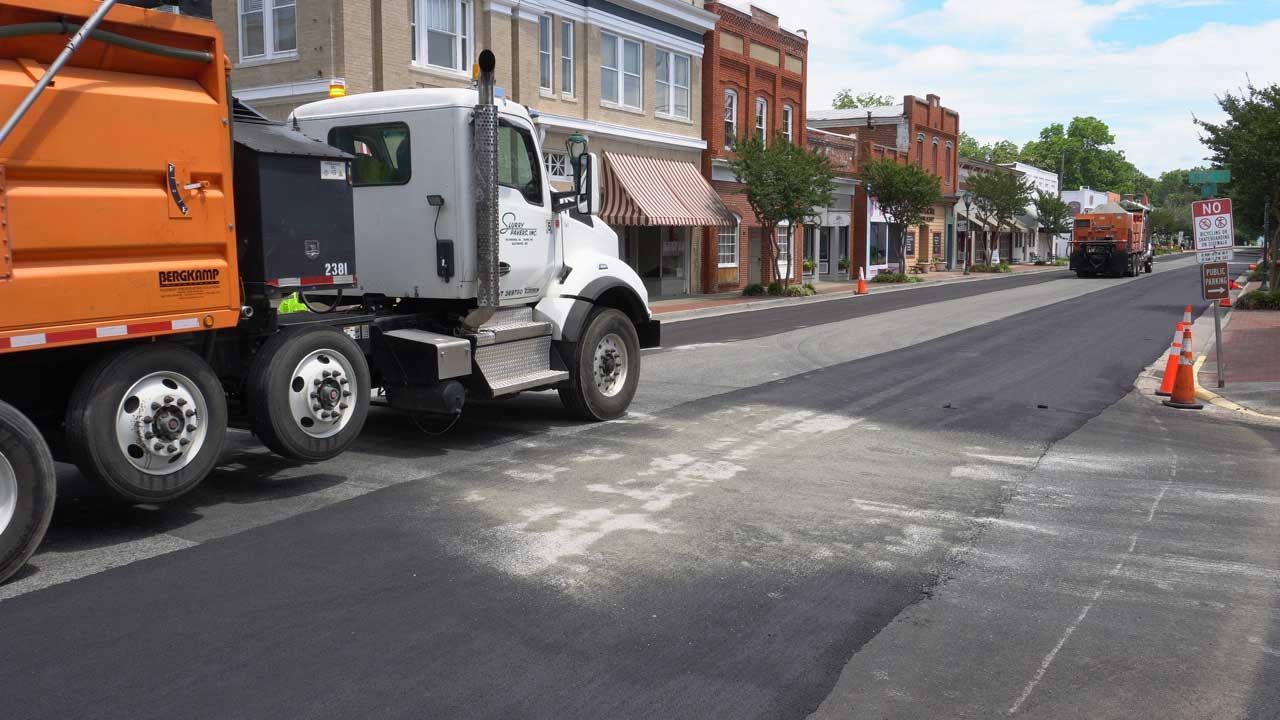
Slurry Seal Application
- First Pass: The crew begins by placing one lane of the slurry treatment down and marking it off with cones
- Wet slurry should not be driven on at all
- The lane will be closed for 1-4 hours to allow the surface to dry enough to pass over
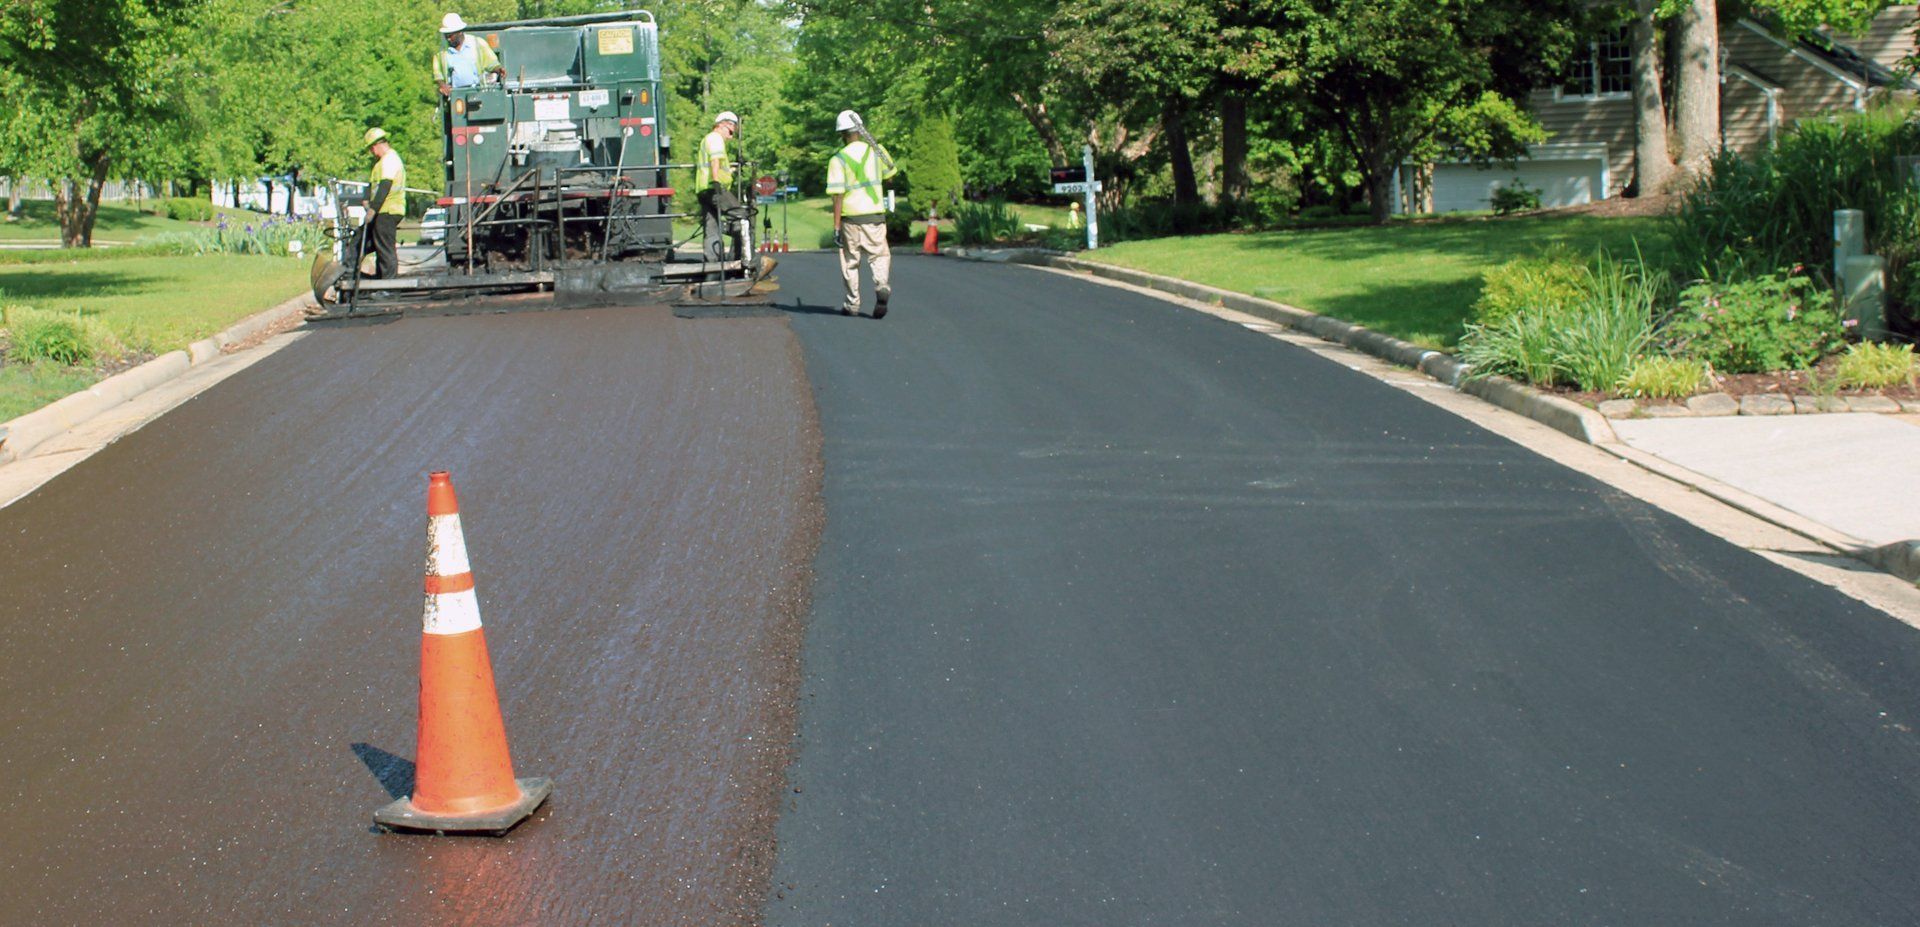
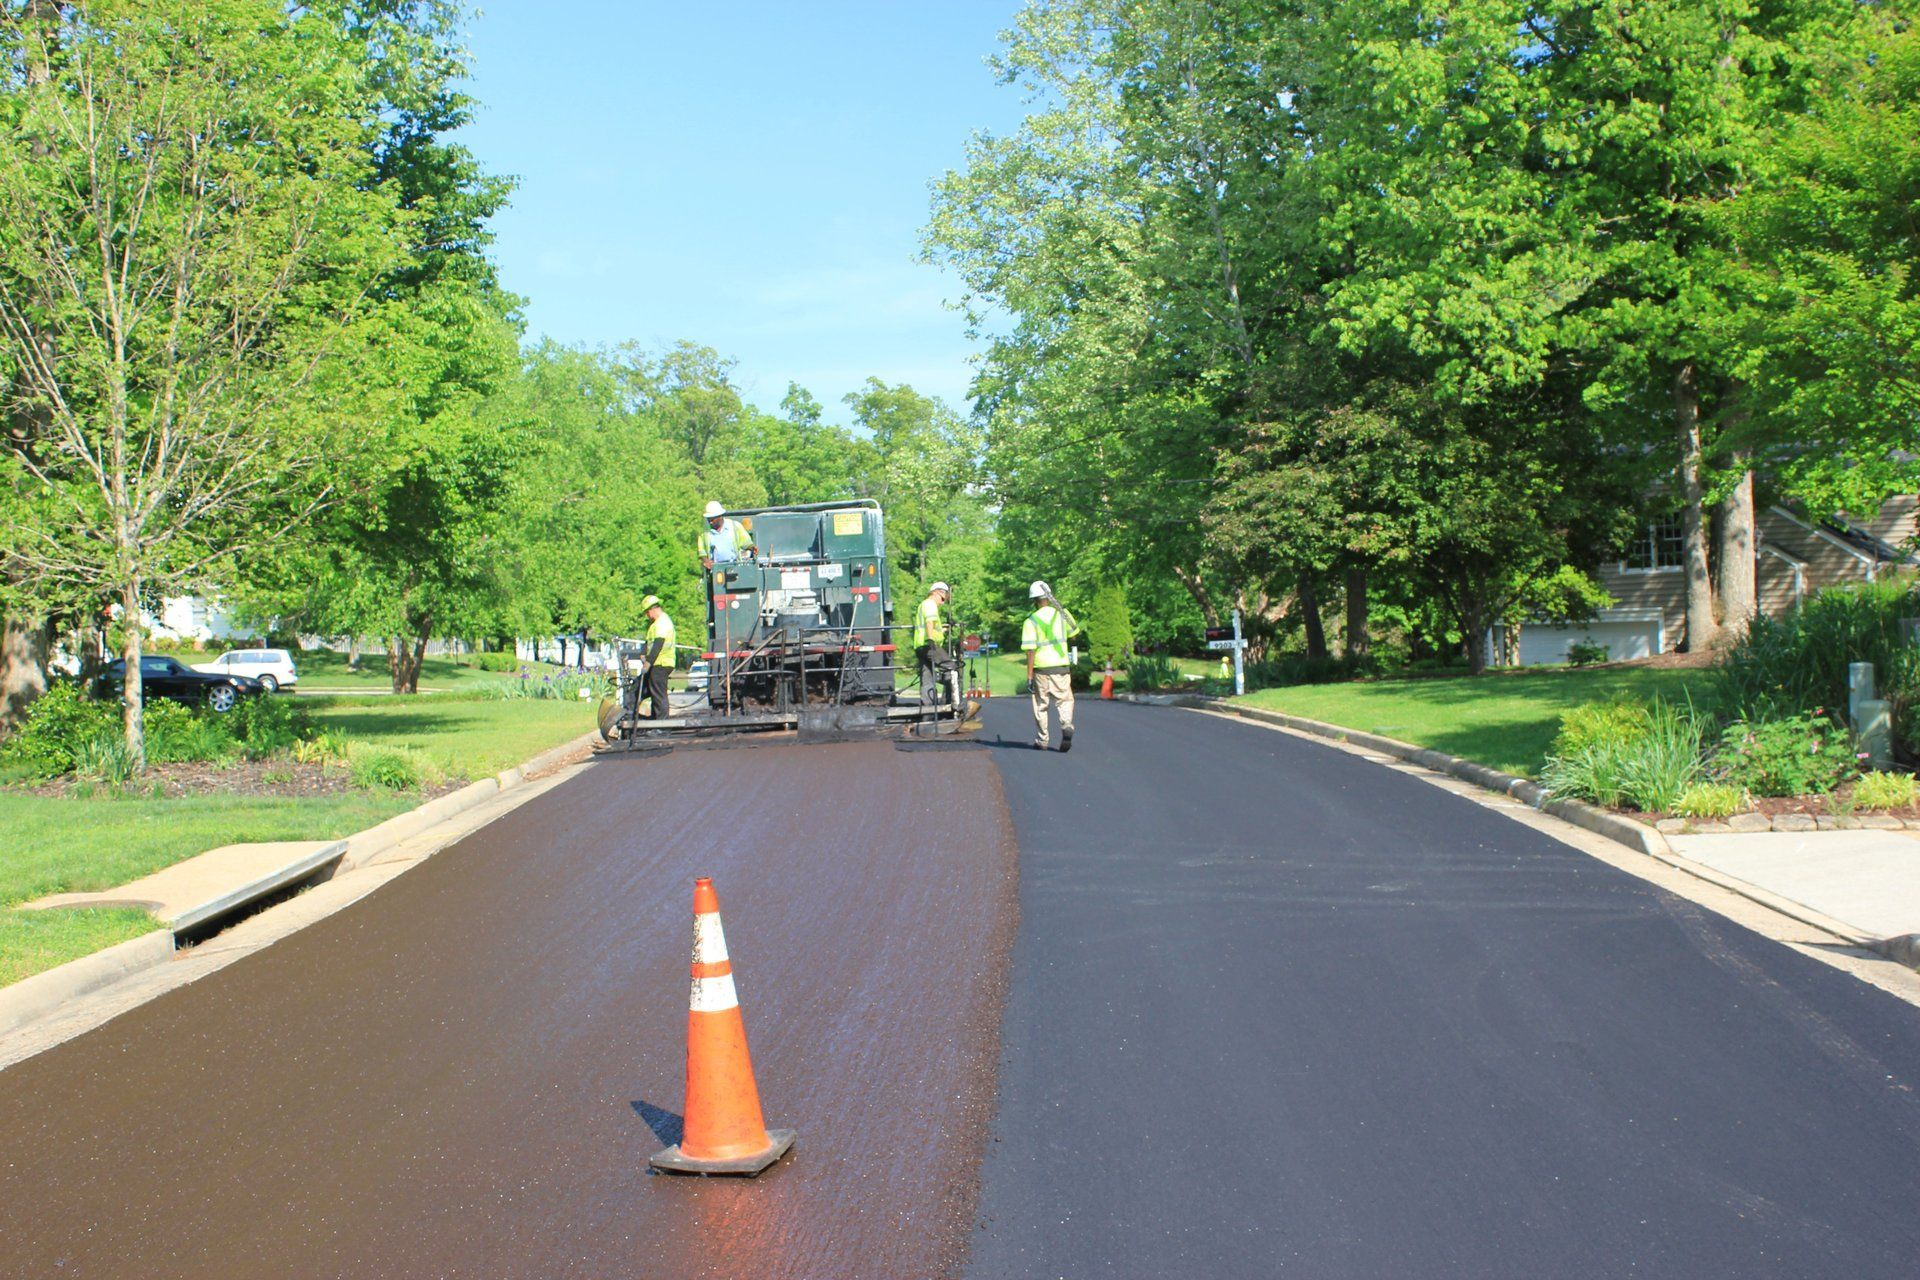
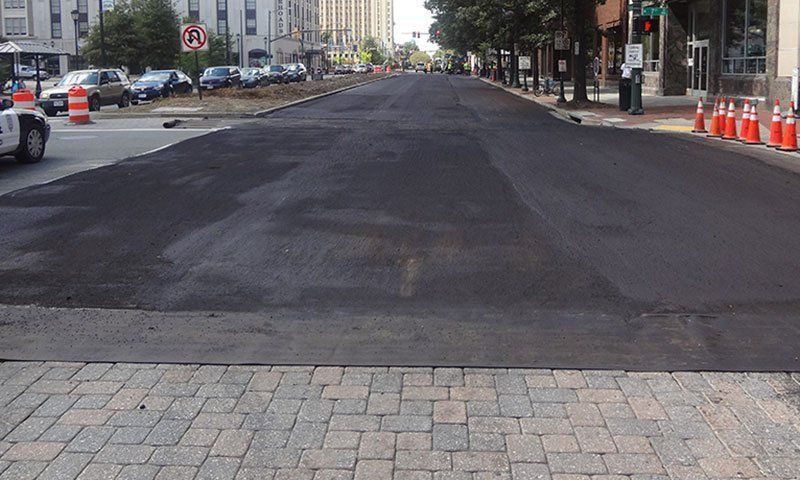
- Length of time depends on treatment type and weather conditions - you'll know it's safe to drive on when the cones have been removed. The dry lane will be much darker than a wet lane as shown in the next photo.
Slurry Seal Application
- Second Pass: After the first lane has dried enough for traffic, the second lane is applied.
- At least one lane will be available at all times.*
- You will always have access to and from your home, but may not be able to cross the wet slurry for up to an hour.
TIP: Note the brown color of the fresh, wet slurry seal and the charcoal gray color of the dry slurry. Color is a good indicator of when the slurry seal is dry.
TIP: If you're in a bind and have to cross wet slurry to get in or out of your drive, call the local crew chief to spread some of the crushed stone aggrregate in front of your drive so you can cross safely. The supervisor's number is on the notice. Please note that the material will discolor the new surface until it wears in so leaving before the slurry goes down is preferable.
NOTE: Cul-de-sacs
Some cul-de-sacs need to be completed all at once. If this is the case, residents will be notified.
In some instances, homeowners have told us they would prefer it be done all at once to get it done faster. If this would be preferable for you and your neighbors, please let the supervisor on your notice know. Doing so makes it easier on everyone.
After Slurry
Once the slurry seal has been placed, it has to dry, cure and wear in to its final profile. This process may include some color normalization as well as "ravelling" off of surface stone as the slurry seal smooths in.
There will also likely be some clean-up necessary to meet standards. This will include sweeping up the stone ravel that accumulates, as well cleaning off any excessive amounts of slurry seal or debris in the curbline.
Throughout this process, you local road administrators will be inspecting the work and communicating anything that we need to do to meet expectations.
TIPS: If you see something you would like us to inspect, please let us know. Please review the
common concerns and
common misconceptions for information about some of the things you might see and what they are.

Sweeping: 1-2 weeks after application
Some of the fine surface gravel will wear out of the surface as it wears in and smooths out. The loose gravel is almost always no larger than 1/4 of an inch in diameter by design. There may also be some of the aggregate sand left at intersections or other areas where it was spread for traffic to cross. There may also be places along the curb where loose aggregate can accumulate.
Striping: 2 weeks to 30 days after application
All road markings covered or eradicated prior to the project are replaced within the specified time limits and according to the terms of the contract. Placement and materials are the same as the originals unless specified in the contract.
Punchlist and Quality Control
During installation, a punchlist is generated to make sure any necessary patching and/or cleaning is addressed. After sweeping and completing the installation punch-list, we and our project inspectors will do a final quality control check. We'll make sure everything's been done to standards and that the seal is performing as it should.

NOTE: Power Steering Burns
Slurry seal's high asphalt content makes it especially vulnerable to scuffing while it cures. Most of these marks will disappear in time. See below for an example.
Here are some tips to help avoid creating scuffs.
-Avoid sitting still and turning your wheels or cutting the steering wheel hard like after backing out of a driveway or while parallel parking.
-Instead, after backing out, begin moving forward before turning your wheels. Moving while turning wheels will greatly reduce scuffing
-Keep speeds low to moderate for at least 24 hours and a few days if it's really hot outside.
Common Concerns
Sanding
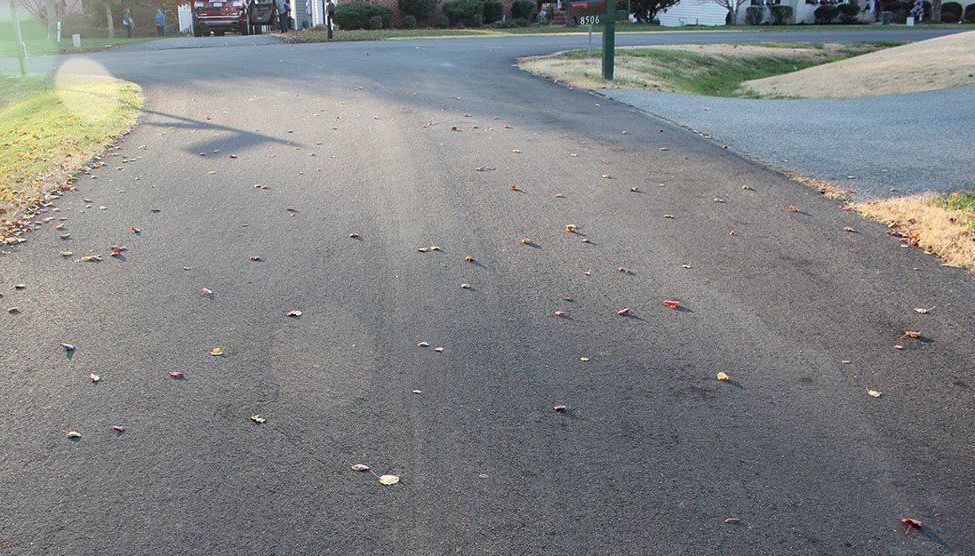
In some areas, a finely crushed rock aggregate "sand" is spread at intersections to protect the wet slurry and vehicles. This will remain on the road while the surface cures and will be swept up a week or two after application. The finer particles in the crushed aggregate that's spread will embed into the surface asphalt and leave a gray stain. This will wear in and normalize with the rest of the surface over time. These photos were taken about two months apart.
Please note that this is what is spread if you call the supervisor in order to cross wet slurry at your drive.
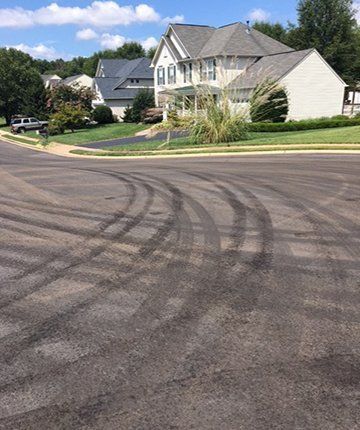
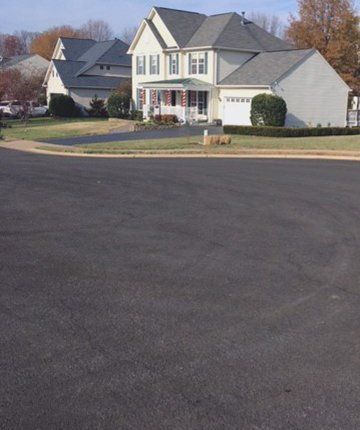
Scuffing and Marring
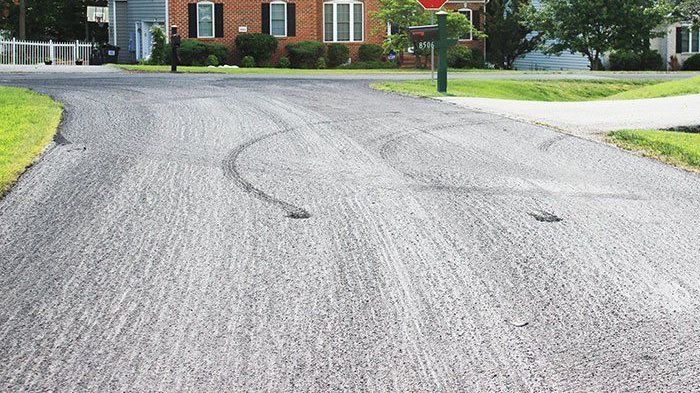
Because of the high asphalt content and smaller size of the crushed aggregate used in slurry seals, they are vulnerable to surface damage from vehicles. This is true when they are new and during hot days until it fully cures. High temperatures will soften any type of asphalt material, including plant mix asphalt. The marks shown here are from driving and hard turning on a fresh slurry seal. As with this example, most of this type of marring will blend in in time. Note also the initial texture when it was first placed the texture after it had time to wear in. This road is a cul-de-sac with little traffic and the wear in shown occurred within the three months between photographs.
Texture
One thing we hear every season is that the texture is too rough. It's dangerous. It's bad for bikers. It's true that initially it is rougher than the plant mix surface they may be used to. But because slurry seal is a liquid asphalt resurfacer, it contains more asphalt and less large stone than the plant mix asphalt it's designed to protect. Slurry seal's smaller stones at the surface will give it a rougher texture initially, but will wear into the asphalt or out of the mix in the weeks after placement, thereby smoothing the surface. As the photos of slurry seal on the right from the Start/Finish of the 2015 UCI World Championship show, it will wear in and be great for cycling and anything else you want to do.

Discolorations
Under certain conditions, the surface of the slurry seal may not initially present its normal charcoal gray/black color. Though not often, brownish tints or white spots can occur. This will normalize given time.
Discoloration Marring
When there is discoloration in cul-de-sacs, the turning of heavy garbage trucks can leave unsightly tracks. This is a good sign as it is the discoloration normalizing. In this extreme example, the cul-de-sac looked like any other in a couple of months.
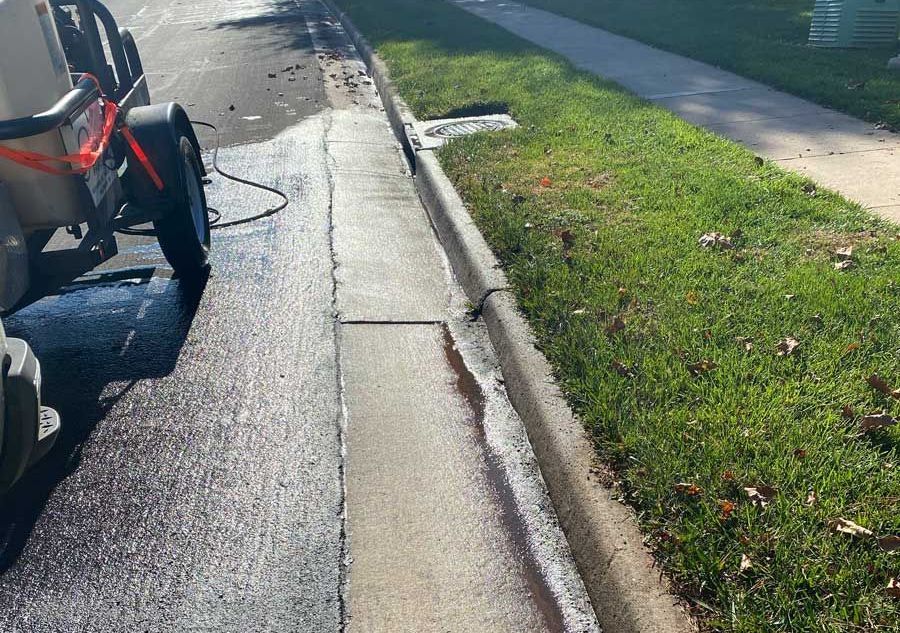
Slurry Seal on Gutterpan
Sometimes an operator may make a mistake or may run into an equipment or environmental issue that causes material to get too far into the gutterpan. In these cases, like the extreme one shown here, the material will be cleaned from the gutterpan.
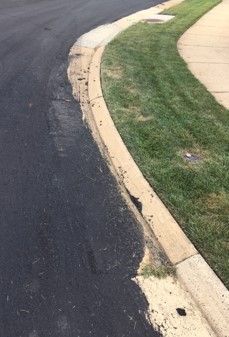
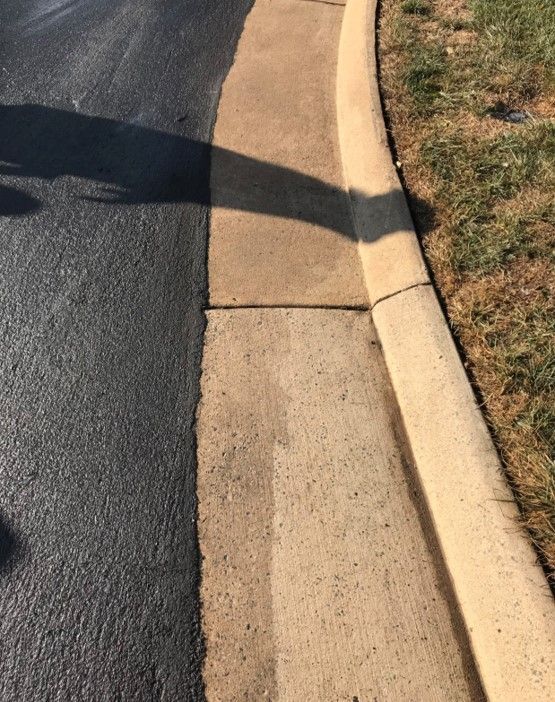
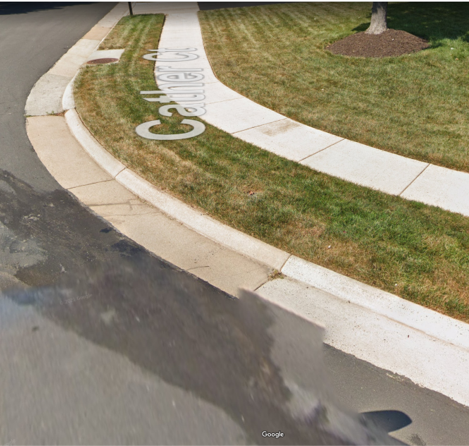
Clean-up Stains
The clean-up along the curbline can leave stains. In most cases, to try and remove the stains would cause damage to the concrete. However, as these pictures show, the stains will bleach out in the sun and disappear.
Common Misconceptions